

Showing WooCommerce upsell popups won’t yield maximum results if you don’t trigger the popups at the right moment when conversion chances are highest.
By displaying upsell popups in WooCommerce at the right time, such as before the cart page or checkout, you can make immediate conversions and increase the average order value of your store.
A study by Epsilon reveals that 80% of customers make repeat purchases when personalized recommendations are presented which you can also implement by showing upsell popups for WooCommerce.
However, WooCommerce lacks built-in features to show popups. This limitation can be tackled by integrating a popup plugin like UpsellWP.
In this blog, we’ll guide you through the steps to add WooCommerce upsell popups and highlight the three best popup plugins for your store. Let’s get started.
Encourage customers to make additional purchases by showing customized upsell popups using UpsellWP’s popup feature.
How Showing Upsell Popups in WooCommerce Benefit Your Store?
Showing WooCommerce upsell popups is important in increasing average order value by casually suggesting additional products to customers. Here’s why displaying upsell popups is a smart strategy:
Increased Profit Margins
Upsell popups encourage customers to purchase premium versions of their current purchase, directly boosting the profit margins of your WooCommerce store.
Personalized Shopping Experience
Improve customer’s shopping journey by displaying related products tailored to customer interests and purchase history, offering a more personalized experience.
Immediate Conversions
Make immediate conversions by triggering WooCommerce upselling popups at the right time when customers are highly receptive to adding items to the cart.
Product Awareness
Use popups to showcase new products that customers may not know about, increasing visibility and the potential for additional purchases.
Inventory Management
Promote non-moving or slow-moving products through popups to manage inventory effectively and boost sales for those items.
Low-Key Promotion
Upsell popups act as gentle suggestions rather than direct promotions, making personalized recommendations that casually encourage customers to buy more.
Related read: Here’s the curated list of best WooCommerce product recommendation plugins.
How To Add WooCommerce Upsell Popups?
You can add upsell popup in WooCommerce by following these 3 steps. Here, I have used UpsellWP plugin to demonstrate the steps.
Step 1: Installation and Activation
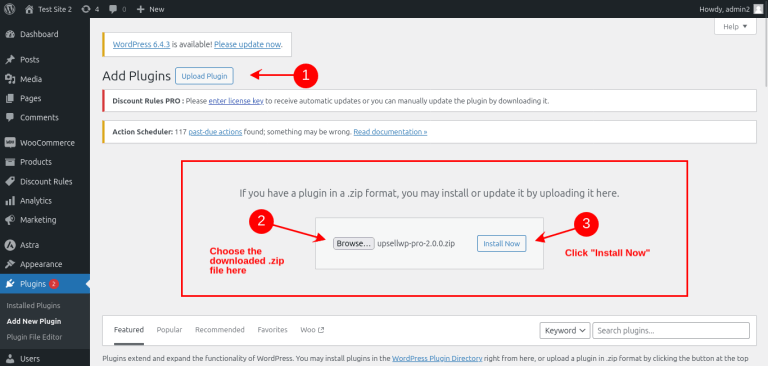
- To install the plugin, go to WordPress dashboard -> Plugins -> Add new plugin.
- Select upload plugin -> choose file and upload the downloaded zip file.
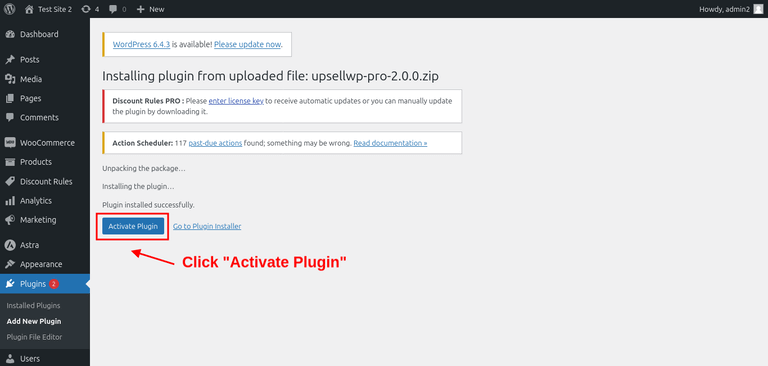
- Once installed, click Activate plugin to activate.
Step 2: Add New WooCommerce ‘Upsell Popups’ campaign
- Now go to UpsellWP -> Campaigns -> Create new campaign.
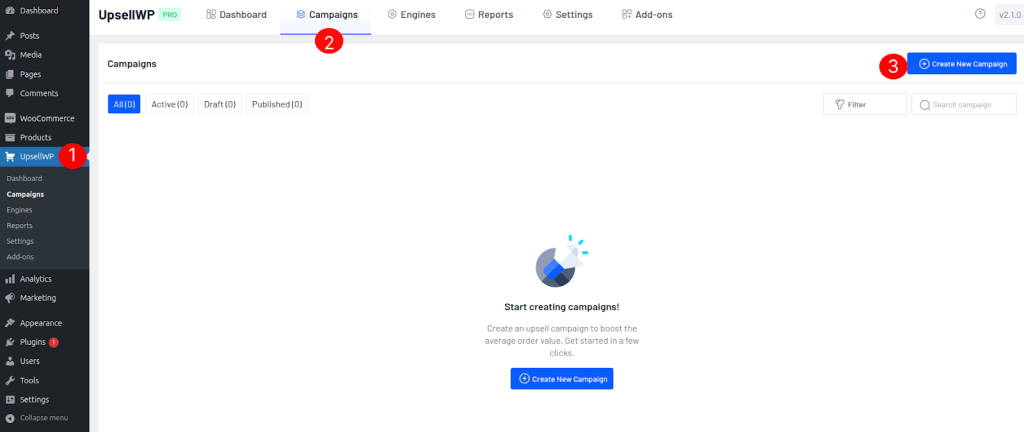
- Select Upsell Popups and enter the campaign name for reference.
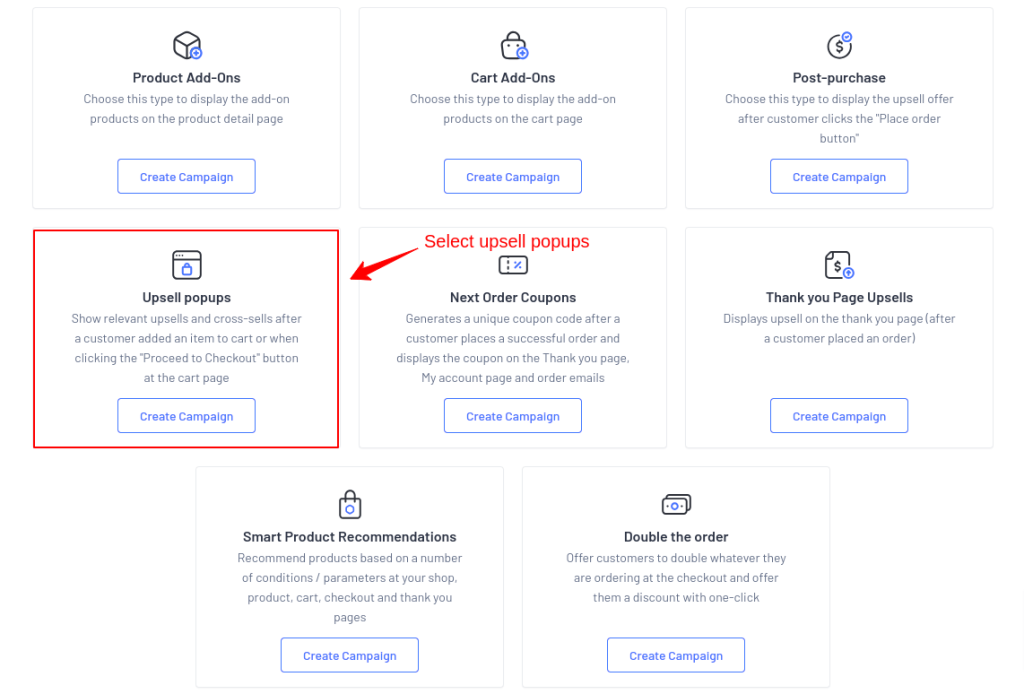
Step 3: Choose the Trigger Option
UpsellWP provides 2 trigger options,
- Display popup after the customer clicks ‘Add to Cart’ button.
- Display popup once the customer clicks ‘Proceed to Checkout’ button.
Trigger 1: After Product Added to Cart
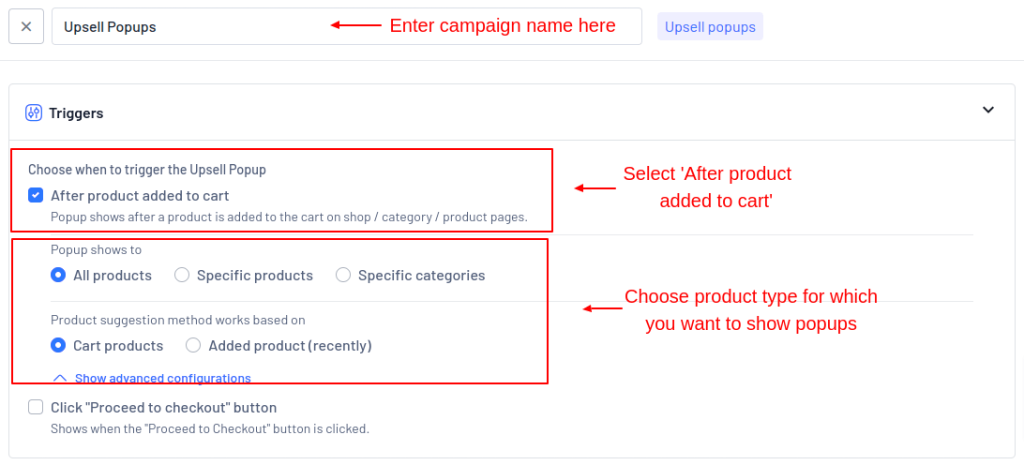
- Select After product added to cart.
- Choose if you want to show popups for ‘All products/Specific products/Specific categories’.
- For instance, I have chosen ‘All products’ here.
- You can also select if you want to show popups for ‘Cart products/Recently added products’.
- For instance, I have chosen ‘Cart products’ here.
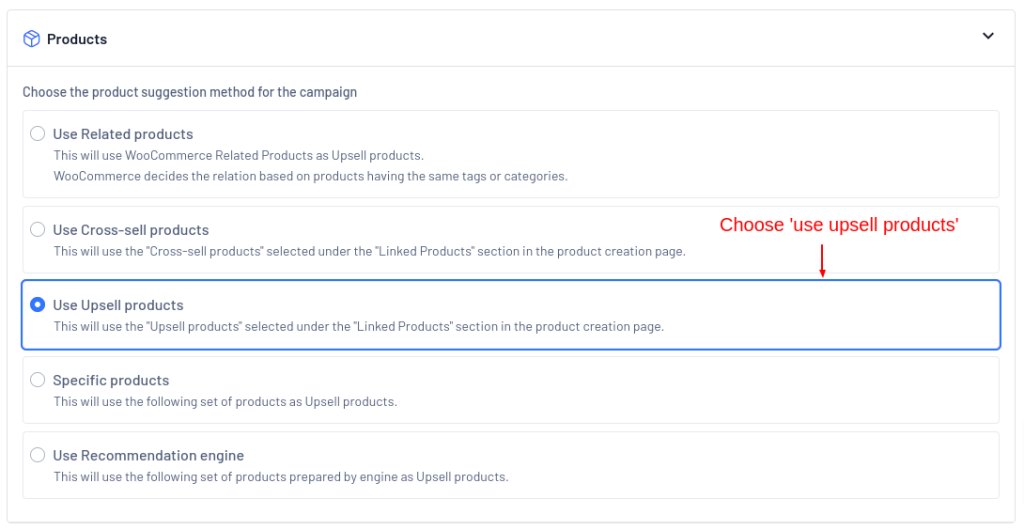
- From the products section below, choose the method of product suggestion.
- For instance, I have chosen ‘upsell products’
- You can choose any product suggestion method based on your business requirements.
Note: Use this guide to show cross-selling products in the popup window.
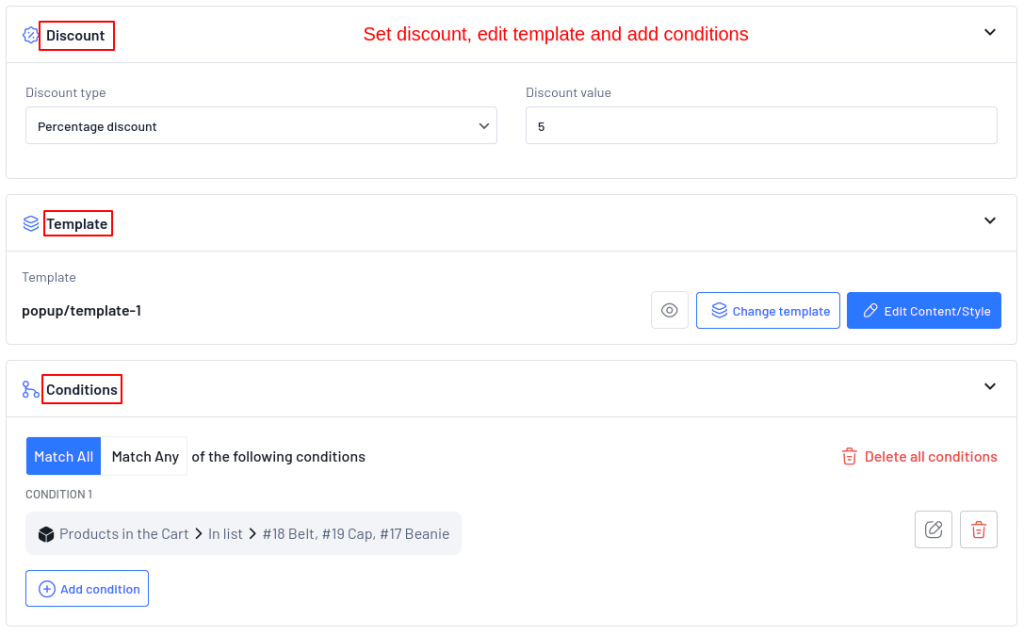
- Scroll down to the discount field and set the discount type as fixed, percentage, or no discount.
- Set discount value in the value field.
- For instance, I have chosen ‘percentage discount’.
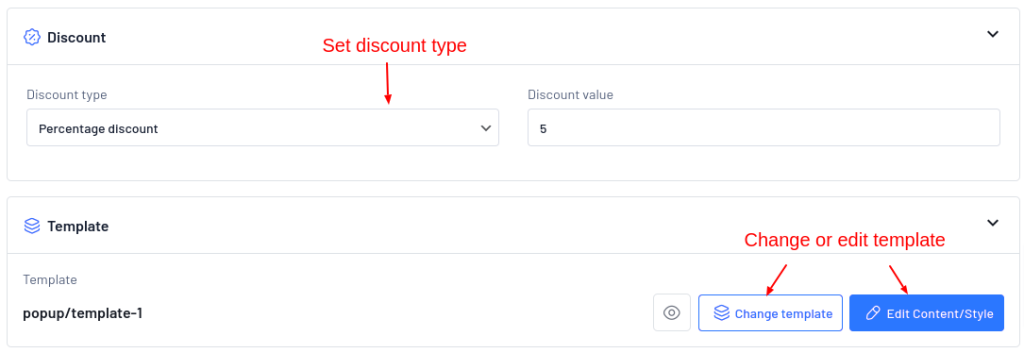
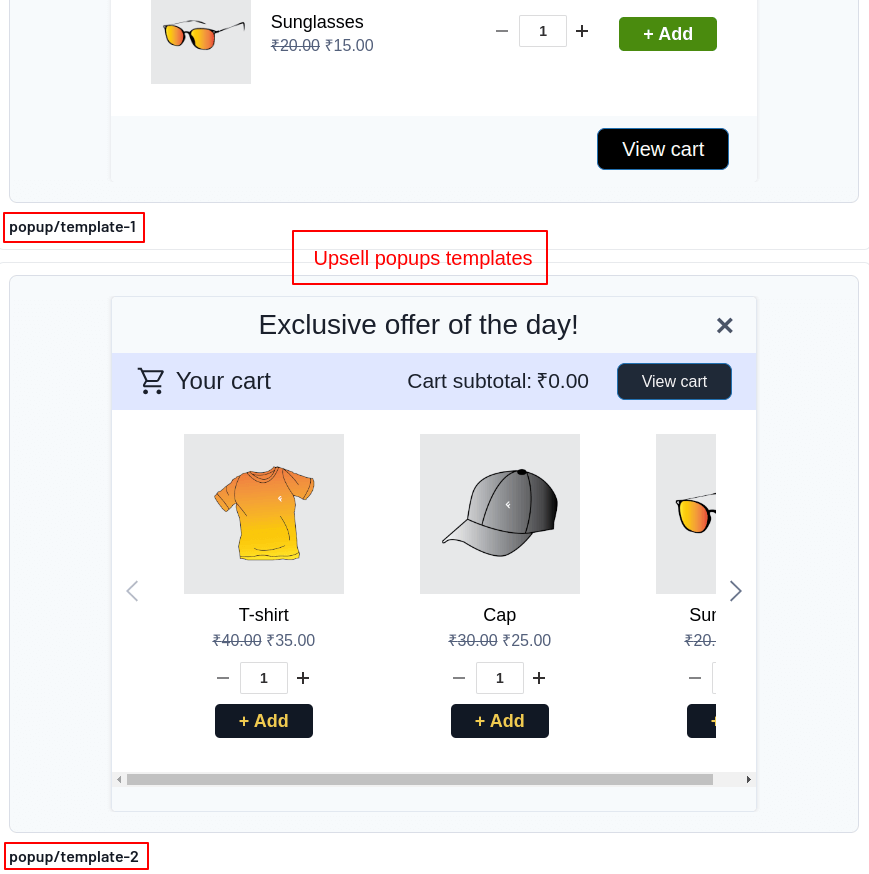
- To change the popup template, click change template.
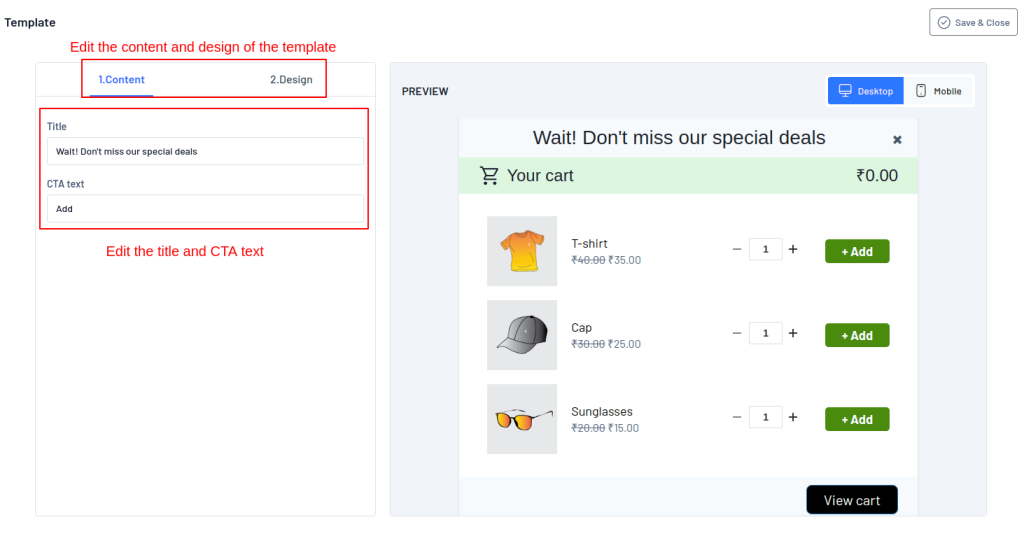
- Select Edit content/style to customize the content and design of the template.
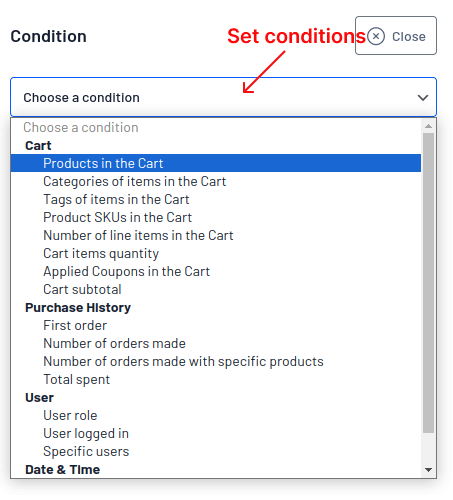
- Scroll down to conditions and select the conditions based on cart, purchase history, user, or date & time.
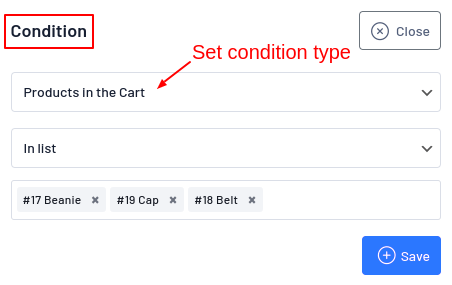
- For instance, I have set the condition to ‘Products in the cart’
Note: You can set any conditions.
- Scroll up to the Optional settings to set priority and from & to date of the campaign.
This is totally optional which you can set based on your WooCommerce store needs.
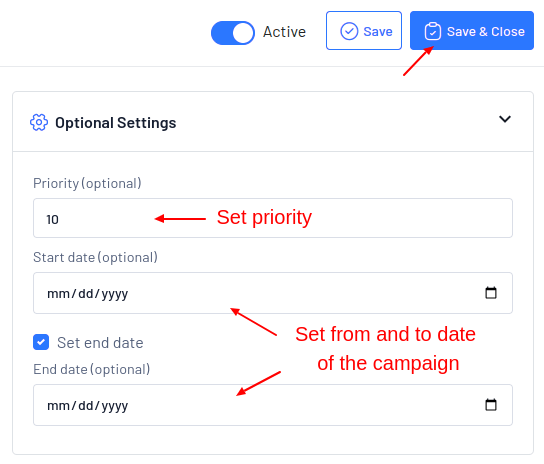
- Now click Save & Close.
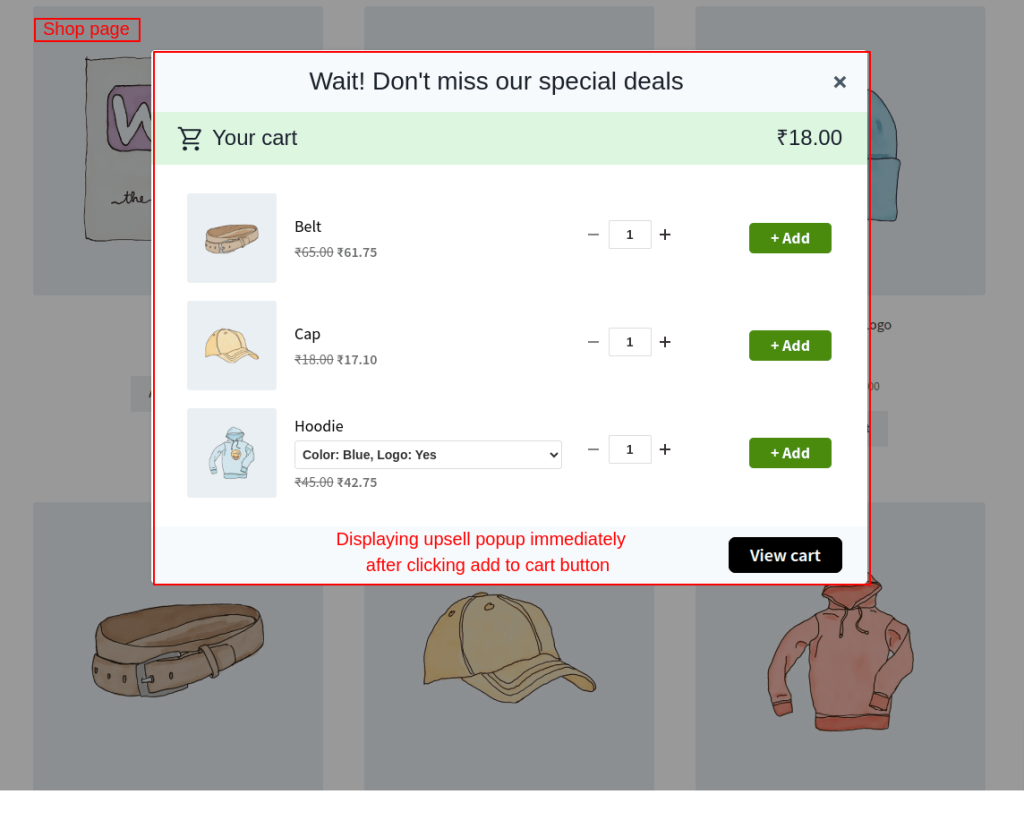
This way, you can show upsell popups after clicking the add to cart button.
Increase your customer’s cart size and boost sales by triggering upsell popups just before the cart page and checkout page using UpsellWP’s popup feature.
Trigger 2: Click ‘Proceed to Checkout’ Button
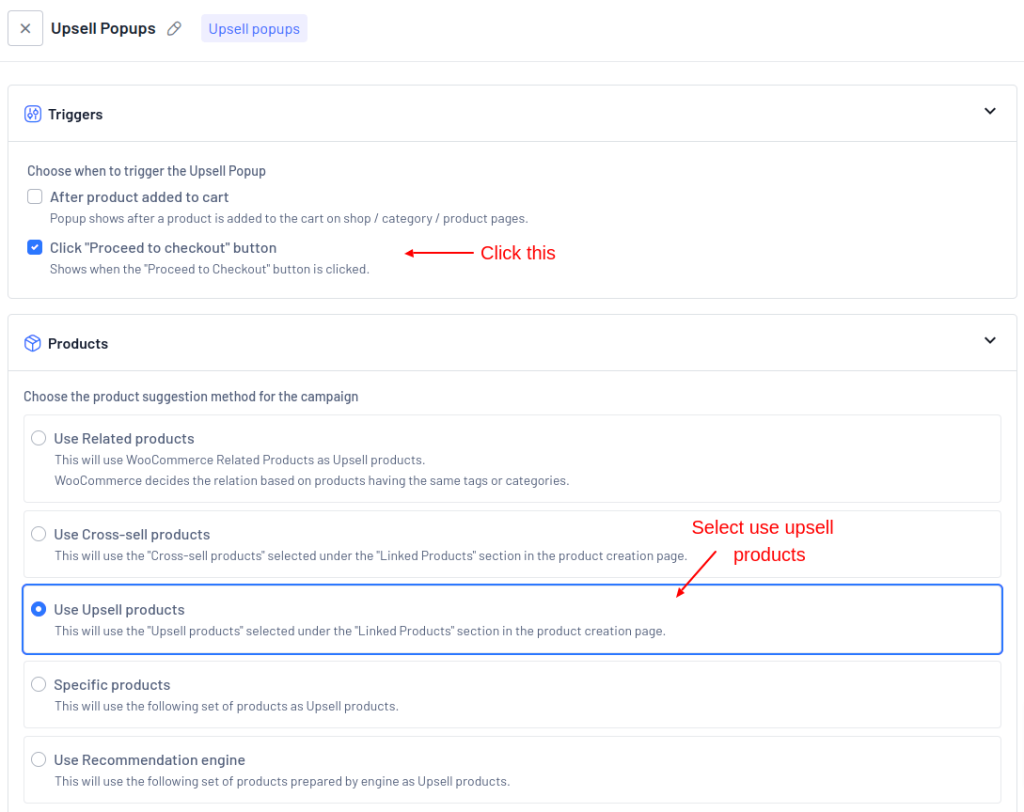
- Select Click ‘Proceed to checkout’ button
- In the products section, choose Use upsell products
- Now set the discounts, edit template content, and add conditions.
This step is similar to the one we have seen in trigger 1.
- Scroll up to Optional settings and follow the steps used in trigger 1.
- Now, Save & Close.
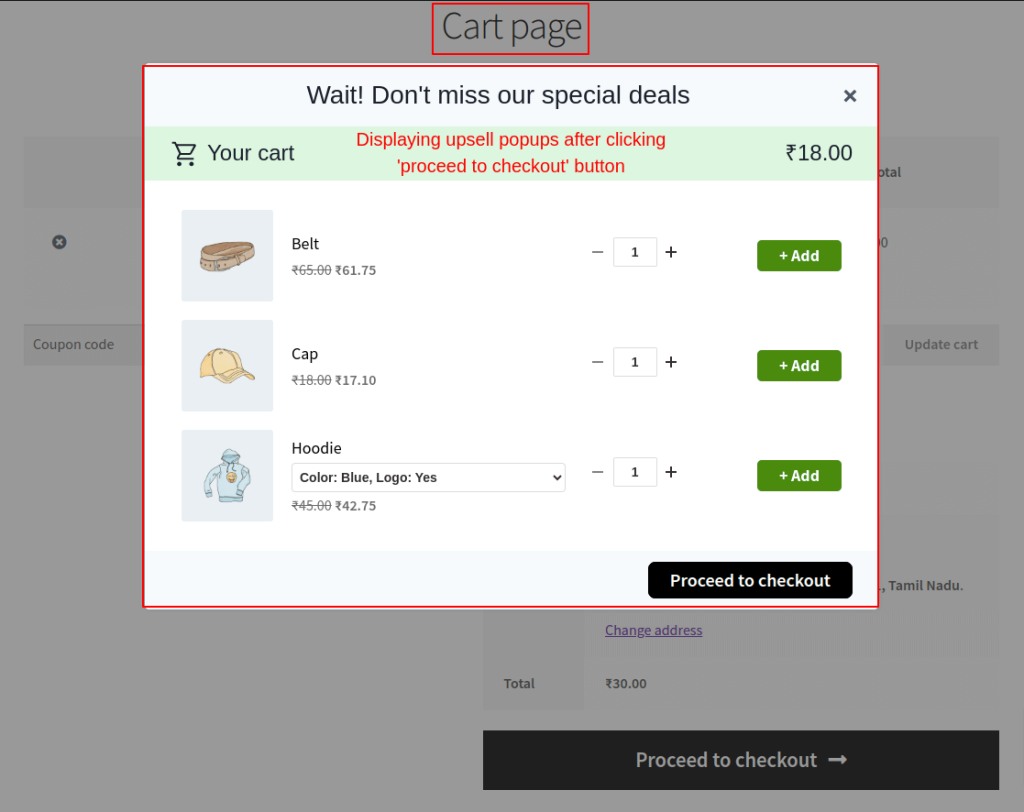
This way, you can display WooCommerce upselling popups after clicking ‘Proceed to checkout’ button.
Best WooCommerce Upsell Popup Plugins
These three best popup plugins for WooCommerce assure an increase in the cart value of your online store.
1. UpsellWP
UpsellWP is the best WooCommerce popup plugin to show personalized upsell offers in the popup window. It provides advanced popup settings and configurations that let you design a personalized popup window based on your brand color and voice.
Additionally, this plugin provides upsell and cross-sell features like frequently bought together, order bumps, one-click upsells, cart upsells, next order coupons, and more.
UpsellWP is available in both paid and free versions. The paid plan starts at $69/year.
2. Cart Upsell for WooCommerce
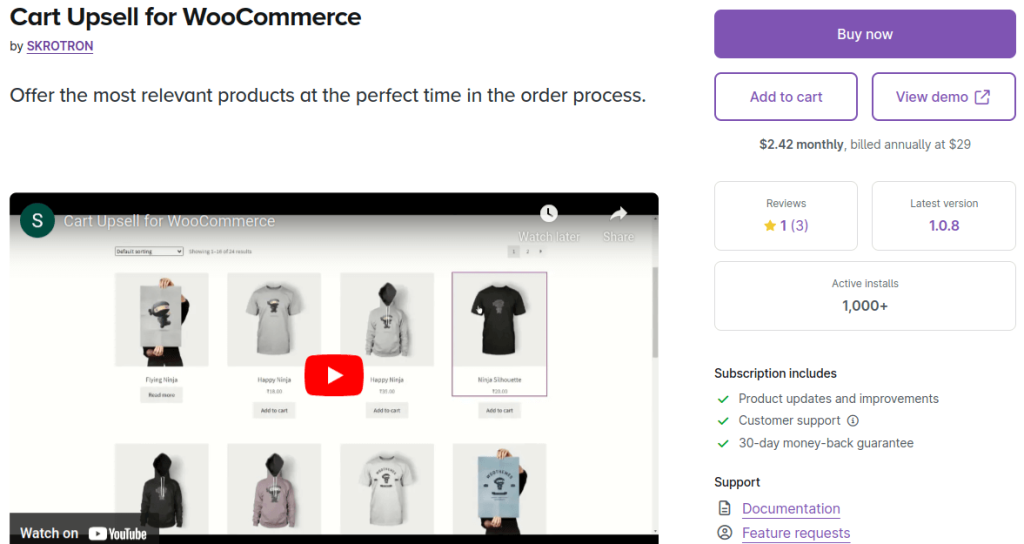
Cart upsell for WooCommerce integrates smoothly with your WooCommerce store and lets you show related products in the popup window.
You can show specific products based on product type, category, and cart total. You can also customize the design, layout, and content of the popup. With this WooCommerce upsell popup plugin, you can set time-specific upsell offers and drive customers to make immediate purchases.
Pricing starts from $29/year.
3. WooCommerce Fast Cart
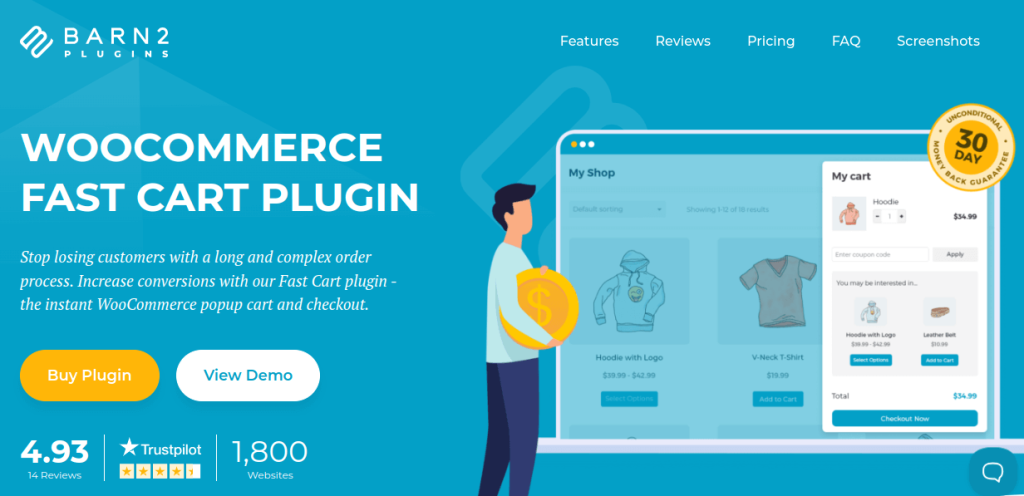
WooCommerce fast cart is another popup plugin to trigger popups immediately after the customer clicks ‘add to cart’ button. Through this popup, customers can make direct checkout without redirecting to other pages of your store.
The paid plan for this plugin starts at $79.
Best Strategies For Adding WooCommerce Upsell Popups
Here, we’ve listed down some best practices for adding upsell popups in WooCommerce.
Personalized Recommendations
- Use customers’ recent purchase history and interests to show personalized upsell and cross-sell products in popups.
- Ensure the recommendations are relevant to current views or current purchases of the customer as they encourage additional purchases.
Cart Size Management
- Allow customers to increase or decrease the product quantity directly from the popup window.
- Provide necessary icons to add or remove the products from the popup.
Easy Navigation
- Enhance your customer’s shopping experience by providing a direct option to accept or decline the popup offer.
- If the customer declines the popup offer, redirect them directly to the checkout page without any hindrance.
Related read: Here’s the list of best WooCommerce checkout plugins.
Manage Popup Frequency
- Set limits on how often and where to display popups as overexposure can lead to customer frustration and cart abandonments.
- Show upselling popups just before the cart page or checkout page when the chances of additional purchases are high.
Appealing Popup Design
- Customize the popup template by adding visually appealing and engaging elements to resonate with your brand’s tone.
- Provide clear product images, headlines, and CTA in the popup window.
Mobile Responsiveness
- Optimize the upsell popups for the mobile view as many customers browse online stores through it.
- Ensure the buttons, forms, and links are neatly spaced and are compatible with mobile view.
By implementing these best strategies in your upsell popups, you can see a significant increase in your WooCommerce store’s conversion rates and customer lifetime value.
Personalize customer’s shopping journey by suggesting related products in the popup window using UpsellWP.
Sum Up
Adding WooCommerce upsell popups not only boosts your store’s cart value but also enhances the overall shopping experience for customers. In fact, the best popup can yield up to 42.5% more conversions.
For creating engaging and effective popups, we recommend using UpsellWP as it offers full customization features to create your popup based on your store needs and goals.
Further reading on Upsells and Cross-Sells:
- Best WooCommerce upsell plugins
- Best WooCommerce cross-sell plugins
- Best WooCommerce order bump plugins
- Best WooCommerce frequently bought together plugins
Frequently Asked Questions
Upsell popup is a sales strategy where related complementary products based on customer’s current purchases are displayed to encourage additional purchases.
Instant upsell is a marketing tactic where the premium or upgraded version of the current product is suggested immediately after the customer adds a product to the cart or proceeds to checkout.
Of course, upsell popups are effective and have high conversions when implemented strategically on your WooCommerce store. Ensure the upsell offers are relevant and adds value to customer’s purchase.
Yes, you can customize the design of the upsell popup using UpsellWP in your WooCommerce store. You can personalize the title text, CTA text, layout, color, and style of the popup.
To remove upsell products from WooCommerce,
1. Go to WordPress dashboard -> Products
2. Click the product for which you want to remove upsells.
3. Scroll down to ‘Product date’ and select ‘Linked products’.
4. In the upsells field, click ‘close icon’ near the product name you set earlier.
5. Scroll up and click ‘Update’ to save changes.